Showing posts with label Vegetarian. Show all posts

Monday, January 14, 2013

Quick Healthy Lunch Idea: black bean tortilla roll-up


I don't know about you but I find it extremely difficult to find quick fast lunches on the go that are healthy and vegetarian. It's pretty much impossible. McDonald's is out, let's face it the salads there are crap. And most other fast food options are equally terrible. I am constantly annoying my husband when we are out and about around lunchtime and everyone is hungry and just wants to stop where ever and picky ol' me refuses to eat a burger and fries for lunch. Sorry guys, but I just know myself and I know if I eat poorly I'll feel sluggish and grumpy for the rest of the day. 

So here is one lunch option I decided to make at home today and I think it could easily be packed up for a work lunch. I got the idea from the latest GOOP e-mail on Superfoods. Thanks Gwyneth!

Here is what I put in my wrap. I just know I'm going to feel great for the rest of the day after eating this for lunch.

Black Bean Tortilla Roll-up
adapted slightly from GOOP

1 whole wheat tortilla (I toasted mine on the pan but not necessary if taking it to go)
hot sauce
black beans
spinach 
feta 
avocado
1 smear of plain yoghurt


Friday, March 9, 2012

The Unrefried Beans


Well, what can I say.....it's pretty hard to make refried beans look appetizing....

Last weekend while at one of my very favourite quick lunch spots, Que Pasa Mexican Food Store, I picked up a bag of dried pinto beans with the good intention of making my very own homemade refried beans. I've never actually done this before but for years I've been meaning to. I've always loved a good refried bean burrito with melted cheese on top and it's always bothered me that the cans of refried beans in the store are almost always loaded with salt and fat. So since I took today off work as a much needed vacation day I thought I'd dust off the ol' slow cooker and put it to work.

I searched through many online recipes before I stumbled upon the Chef Claude's recipe below. Most recipes called for bacon fat or pork lard, GASP! I searched and I searched until I found one that was healthy sounding and animal fat-free. This recipe was easy as can be and tasted better than any store bought refried bean can I've ever found. Serve in a burrito with tortilla chips or as a bean taco as I did.

Refried Beans
adapted from Refried Beans without the Refry by Chef Claude

2 cups dried pinto beans, rinsed
2 garlic cloves, chopped
1 teaspoon cumin
1 teaspoon chiptle puree
1/2 jalapeƱo, deseeded and chopped
1 onion, chopped
5-6 cups water (or enough to cover beans well)
salt and pepper to taste

Place all ingredients into a slow cooker for 5-7 hours. Once beans have cooked drain and reserve the water. Puree slow cooker contents adding reserved water (I did not need to add any water) as needed to reach the desired consistency. Add salt and pepper to taste.


Thursday, December 1, 2011

A Fry To Remember....


I confess that I'm a fry junkie..what's more indulgent than a big ol' basket of hot, salty, greasy fries with a nice cold drink? Even better served with a juicy burger or a tasty sandwich of some sort. So when I stumbled upon this incredible recipe for chickpea fries from the Rouxbe Cooking School website, I knew I had to try them. The fact that they have chickpeas in them makes me think they must be pretty healthy...right?

We actually made these last saturday night as part of our saturday night feast that we decided to make since we had no other plans. We also made incredible Po'Boy sandwiches with deep fried breaded oysters, see picture below, which was also incredible but I'll save that to blog about another day. Needless to say it was an incredible meal to remember which also prompted me to head straight to a yoga class the next day. But oh SO worth it.

Chickpea Fries with Romesco Sauce
by Dawn T at Rouxbe Recipes

1 clove of garlic
zest of 1 lemon
2 Tbsp fresh italian parsley
1tsp fresh rosemary
1 1/4 cups chickpea flour
1/2 cup cornmeal
31/2 cups cold water
1 Tbsp kosher salt
olive oil for frying
parmesan (optional)
lemon wedges for serving (optional)
Romeso sauce for dipping (optional)

Line a 13" x 9" -inch baking tray with non-stick aluminium foil (or use a good non-stick tray) and set aside.

Next, finely grate the garlic and zest the lemon. Next, finely chop the parsley and rosemary and set aside for later.

In a large pot over high heat, combine the chickpea flour, cornmeal, water, garlic and salt. Whisk gently to prevent the ingredients from sticking to the bottom of the pot.

Once the mixture begins to thicken and bubble, reduce the heat to medium and switch to a rubber spatula. Stir constantly and scrape the bottom of the pot to prevent scorching. Next, add the parsley, rosemary and lemon zest and continue to cook for about 6-8 minutes.

Once done, pour the batter onto the prepared baking tray and quickly spread the mixture out evenly. Cover with plastic wrap and refrigerate for about 4 hours or until completely chilled and set.

To prepare the fries, first gently flip the tray over onto a cutting board. Cut the mixture lengthwise into equal sections and then cut across into pieces approximately 3" -inches long.

Next, slowly heat approximately 1/2" -inch of olive oil in a large non-stick fry pan over medium heat. Once the oil reaches about 375˚F you are ready to start frying.

Fry the chickpea fries until they are golden brown on all sides, about 2 minutes each side. Once done, remove them from the oil and set onto a cooling rack lined with paper towel. Sprinkle with kosher salt and or/freshly grated parmesan cheese to taste.


The fries before they got fried

Frying the fries


Here is the Oyster Po' Boy sandwich we ate with the fries, recipe to come another time...


another shot of these lovely fries...


and even this guy liked the fries..Success!


Tuesday, October 25, 2011

Garlicky Roasted Squash


A few weeks ago while I was visiting my family on Vancouver Island for Thanksgiving, I brought over a bunch of squash to add to the feast, see pretty picture above. I'm trying to recall what type of squash these were but alas I was completely distracted by the dazzling array of colours of the bounty of produce at the Burnaby Farmer's Market and so I regret that I did not noticed their names. 

Anyway, after some discussion on how to prepare the squash we decided to roast them very simply but in a tasty way that cannot be beat. I was inspired by my sister Ashley's method of roasting butternut squash which I've drooled over on many an occasion. A big thanks to my other sister Melody for doing the grunt work of all the chopping! The most labour intensive part without a doubt. 

Roasted Squash (serves 6-8 people)

Cooking time: about 45 minutes

3 small squash cut up into 1 inch cubes
coat with olive oil
6 garlic cloves
salt and pepper to taste

Variations: add fresh thyme, sage or other fresh herbs. A bit of maple syrup to make it sweeter perhaps?

Combine squash, olive oil to coat and minced garlic in a large baking tray. Add salt and pepper to your preference. Cook at 375 for 45 minutes or until cooked all the way through. 


Friday, September 23, 2011

Cauliflower Mac and Cheese


So it's no secret around here that I'm a big Jamie Oliver fan,  I may have mentioned him once or twice. So you can just imagine my excitement when my good friend Lena told me that he has a new show called Jamie's 30-minute meals. How exciting is that?

The main idea of his show is to be able to cook a full meal in well under 30 minutes. And by meal he actually means a main course, a side, usually a salad and a dessert as well. After watching several episodes I think it may be slightly ambitious to think I could do all that in under 30 minutes while also watching a 1 year old so I decided to start small and cook a main course from one of his episodes cauliflower mac and cheese - a healthy twist on the comfort food classic. 

So I gathered my ingredients and set things up beforehand like he suggests - kettle full of water and set on boil, pans out, chopping block and knives ready and food processor out and ready to go. I was ready as I would ever be. So I set my timer and went to work. I was fairly surprised when I managed to get the dish into the oven in about 11 minutes flat. Wow! I didn't think I had it in me. And it was cooked and ready to eat in about another 15 minutes as well. So it is possible to make a meal quickly afterall.

I made a few variations from Jamie's recipe - he puts crispy bacon into the topping which I omitted, although I'm sure that would make the topping even better. He also used creme fraiche which I could not find at my local grocery store and so I substituted in plain, thick greek yogurt. Also, I apologize big time for giving measurements in weights but unfortunately that is what Jamie did on the show. Sadly I don't own a kitchen scale and so I approximated the weights based on the weight given on the front of the package. 

Nonetheless, the end result was a yummy, creamy mac and cheese with a healthy twist  of added cauliflower. I ended up making 2 small pans and froze the second pan (uncooked) for another evening when I don't have 30 minutes:)

Cauliflower Mac and Cheese (serves 6)
adapted slightly from Jamie Oliver's 30-minutes-meals

200g cheddar
a handful of fresh basil (fresh oregano or thyme would also work well)
3 cloves garlic, minced
1 Tbsp olive oil
250g plain greek yogurt
about 2 cups starch water from the pasta
4 slices old bread
salt and pepper
1 head cauliflower (quartered)
1 package whole wheat macaroni

1. Fill Kettle with water and turn on. Once water is boiled add to a pan with quartered cauliflower and the package of macaroni. Cook together until pasta is almost cooked. Remove pasta and cauliflower and keep starchy water that it cooked in.

2. Meanwhile, make the bread topping - In a food processor place your bread, 1 clove garlic, handful of basil (or other fresh herb), olive oil, pepper and pulse until you have a nice crumbly like consistency.

3. Place cooked pasta and caulflower into a baking pan and next use a potato masher and quickly mash the cauliflower slightly to break it up.

4. Add to your pasta in the baking pan the 250g yogurt, 200g cheddar also grated in the food processor (if you have that attachment), 1 clove minced garlic and add 1 cup of the leftover starch water that the pasta cooked into. Stir until you have a nice creamy consistency. Add more starchy water if you need it. I used about 2 cups I think.

5. Spread crumb topping on top and cook at 375 degrees until the cheese starts to bubble. 


Tuesday, August 30, 2011

Pad Thai


Hot, sour, salty and sweet....thinking about Thai food always takes me back to when I was an eager and naive 18 year old backpacking through Thailand without a care in the world, or at least that's how I remember it now. I'm sure I must have had some worries.. like what should I eat today? how late should I sleep in today? Aaaah, to be 18 again.. I was so young I never even drank alcohol since I genuinely hadn't developed a taste for it yet and I wore nothing on my feet but a cheap pair of flip flops for 4 solid months. The only way I'd ever do that now is if I was pregnant and my feet were too swollen to fit into proper shoes.

As I ate my way through Thailand as I like to say, I would frequently gobble up pad thai from the street carts, devour sweet coconut sticky rice with mango, indulge in heavenly coconut green curry and oh, not to forget my all time favourite Thai dish Som Tam - green papaya salad. The food was absolutely mind blowing to my 18 year old small town Canadian self. It's a no wonder I came home with my face a little rounder and my cotton hippy clothes just a little tighter. But hey, at least I stayed healthy on my travels right? and I had one heck of a time.

Fast forward 14 years...and I still have a soft spot for Thai food and one of my favourite Thai dishes to make at home is pad thai which translates as "fried thai style".  I'll admit it's not necessarily a throw together at the last minute type of meal but if you've got a little extra time it's well worth the effort. I made mine with tofu but feel free to use shrimp, chicken, beef or any other protein you'd like.


Pad Thai (serves 5)
adapted slightly from Rebar Modern Food Cookbook
prep time: approx. 45 minutes

1 package rice noodles
3/4 cup frozen peas (run briefly under warm water to thaw)
1 block firm tofu
1 Tablespoon sesame oil
3 cups bean sprouts
1 bunch green onions, sliced
1/2 bunch cilantro or basil, or both
3 eggs, beaten
8 garlic cloves, minced
2-3 Tablespoons peanut oil (or vegetable oil)

Garnish
crushed roasted peanuts
chopped basil (or cilantro)
wedge of lime

Sauce
1/4 cup ketchup
1/4 cup fish sauce
1/4 cup soy sauce
1/4 cup water
3 Tablespoons molasses
1 Tablespoon sambal Oelek
pepper to taste
2-3 teaspoon red pepper flakes (this is personal preference)


Variations
substitute prawns, shrimp, chicken, pork or beef in place of tofu

Directions

1. Cook noodles in boiling water until done. Drain in a colander, rinse with cold water and put aside.

2. Make the sauce by whisking together sauce ingredients.

3. Beat eggs and scramble, place aside

4. Toss cubed tofu in sesame oil and bake on high until lightly golden. Note: This is an added step which I like. You could omit this and just toss the cubed tofu in with the pan before frying the noodles. Note: This step is not needed if using alternate meat listed below.

Now fry it all together!

5. Heat peanut oil in a large wok or very large frying pan and fry garlic until golden. Add noodles, cooked eggs, tofu, bean sprouts, peas and sauce. Once warmed and bean sprouts have become less crunchy add chopped green onions and basil and/or cilantro. Garnish and serve.


Wednesday, August 17, 2011

Cuban-Style Roasted Sweet Potatoes


I've been making this tasty little side dish for a few years now and it's a favourite around here. Fresh lime juice with garlic and herbs combine with sweet potatoes to make a tangy, comforting side dish. I've seen the recipe on a few different food blogs but it is originally from Alicia Silverstone's vegan food and lifestyle blog called The Kind Life. I am by no means a vegan but I am a big fan of her blog which is where she shares yummy recipes, fashion and lifestyle tips all in a mother earth lovin' kind of way which she actually manages to do without being annoying. She also has a popular cook book of the same name which looks very tempting.

This recipe called for sweet potatoes or yams although according to Alicia what we call yams are actually orange coloured sweet potatoes. I think she said real yams can only be found in Africa or are really hard to find here. Anyway, go ahead and use yams or sweet potatoes I say. I've even used squash before which works equally well.

This dish goes great as a side dish with grilled fish or it would also pair well with my sister's yummy recipe for Spicy Chipotle Grilled Chicken. You could also use it as a filling with beans in tacos or enchiladas. The possibilities are endless and if there are leftovers, count yourself lucky.


Cuban-Style Roasted Sweet Potatoes (serves 4)
adapted slightly from The Kind Life

3 large sweet potatoes, cubed
4 Tbsp olive oil
salt and pepper to taste
1-2 garlic cloves, minced
1 Tbsp fresh lime juice
1-2 Tbsp freshly chopped parsley or cilantro

Preheat oven to 400 F. Place cubed sweet potatoes in a bowl and toss with 2 Tbsp olive oil and salt and pepper. Spread cubed sweet potatoes on a parchment paper lined baking sheet and roast until cooked all the way through. Cool for 10-15 minutes and then place in a bowl. Toss with lime juice, minced garlic, cilantro or parsley and remaining olive oil. Serve warm or at room temperature.


Friday, July 15, 2011

Mujadara - the Poor Man's Meal


I first had mujadara also known as mujaddara or mejadra several years ago at one of my very favourite lebanese restaurant here in Vancouver Nuba. Sweet caramelized onions with soft billowy lentils and brown rice combine with a hint of cumin to make a perfect meal in my opinion. Turns out, Mujadara is a staple meal in middle eastern cooking and it's easy to see why.

I love discovering new dishes especially ones that are easy to make at home and so that very night I frantically googled recipes for this dish. There are countless mujadara recipes to be found online, and they are all generally the same with only slight variations here and there. We've been making it for awhile and I think we've finally got it perfected. Adding cumin really takes it to the next level as well as garnishing with feta cheese if you have it.

This is not a very labour intensive meal to make, once you've chopped up all the onions and wiped your tears away but it does take some time, at least 1 hour. So this is not an ideal meal for slapping together at the last minute since you'll end up getting frustrated when the lentils are still hard and the rice takes forever to cook, believe me I've been there on a weeknight when we were all hungry and cranky. So if you have time for a slow-cooked meal, this is it. And it's well worth the wait.

As a side note, I also gave this meal (without the caramelized onions) to my 9 and a half month old baby who seemed to enjoy it and digested it well. Food for everyone.


Mujadara (serves 6)

1 cup brown rice
2 cups dry brown or green lentils (I used french lentils)
1 teaspoon cumin
1 garlic clove (optional)
3-4 onions, thinly sliced
6-7 cups chicken or vegetable stock (water can also be used instead)
2 Tbsp olive oil
salt and pepper to taste

garnish options
avocado, sliced or cubed
feta cheese
plain yogurt

Finely slice 2-4 onions and fry with 1 Tbsp olive oil. Cook on low, stirring occasionally until brown and caramelized, do not worry if there are burnt crusty bits because it will only add to the flavour. Realistically this step takes about 1 hour. This is the most time consuming part of this dish but cannot be skipped since the onions really make this meal.

Fry 1/2 of another onion in the oil until lightly browned and then add garlic, cumin, 3 cups of stock and the dry lentils. It is not necessary to presoak the lentils, just rinse in water to remove any dust.  Cook for about 20 min on a low temperature and cover, lentils should be almost cooked, it is okay if they are not fully cooked yet. Stir now and again so lentils don't stick to the bottom of the pan. Add more stock if necessary if more liquid is needed.

Next add the rice and the remaining stock, reduce to low and cover. Season with salt and pepper. Cook for another 20 min or until rice is fully cooked. If rice is not fully cooked and there is no liquid left then add more stock if needed.

Serve with caramelized onions on top. Sprinkle with feta cheese, avocado and plain yogurt if you have it. Makes great leftovers.

Monday, May 30, 2011

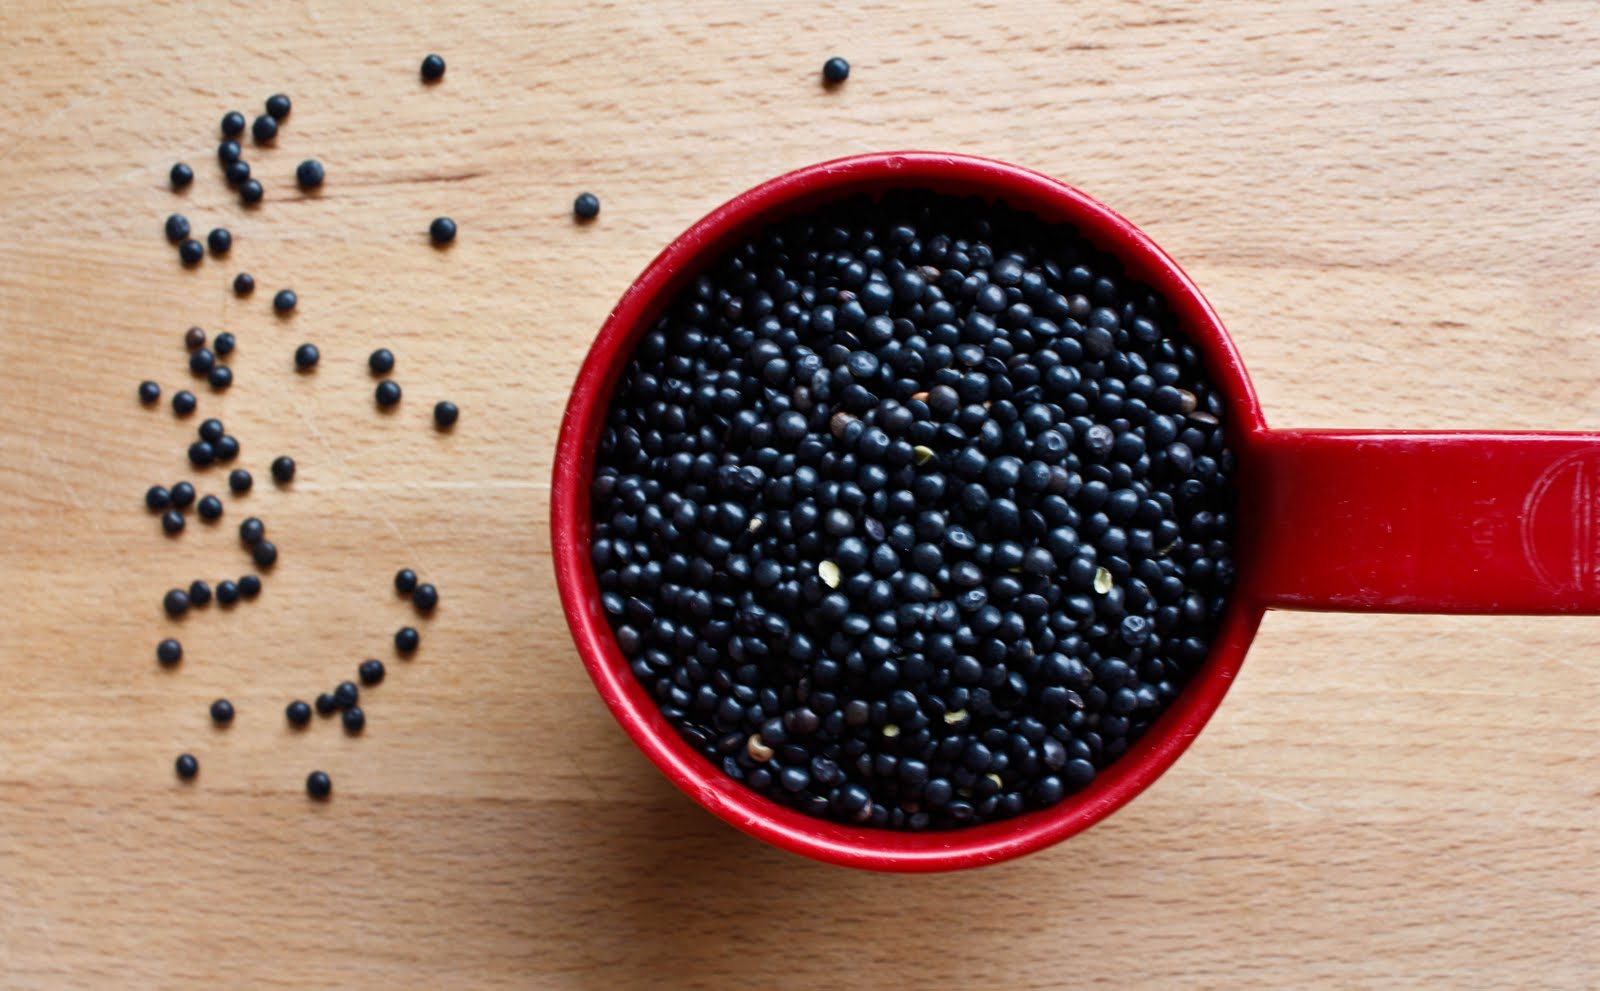
Monday, Monday: beluga lentils with roasted kabocha squash


In order to start the week off healthy and right in hopes of erasing some weekend missteps, I decided to make something from the Mark Bittman cooking app How to Cook Everything. This is a super cool little app if you are an iphone user with 2000 healthy recipes with several easy search options all for only 5 bucks! Talk about a steal of a deal! As you know I am a big Bittman fan and so this was far too tempting for me to resist.

I started out with good intentions but quickly hit a road block when I attempted to cut up the kabocha squash. Seems it would be easier to chisel my way through a cement wall. Nonetheless, I decided to save the job for Kelly when he got home from work. This meant loads of time to put the squash to other uses, like a fun toy for my little guy (see below).

All in all, this recipe was another home run for Bittman. I chose to use Kabocha squash since I love its sweet taste but really any squash would do the job. My only criticism if any was that I found it slightly dry and so next time I will add more chicken stock and white wine.


Lentils with Roasted Kabocha Squash
from Mark Bittman's How to Cook Everything App


2 Tbsp extra virgin olive oil
1/2 onion, chopped
2 tsp minced garlic
1 bay leaf
1/2 cup dry white wine
2 cups chicken, beef or vegetable stock or water
1 cup dried brown lentils (I used beluga lentils)
salt and freshly ground black pepper
chopped fresh parsley for garnish
2 cups roasted squash of choice (I used kabocha)

1. Put the oil in a medium pot over medium-high heat. A minute later, add the onion and cook, stirring occasionally, until the onion is soft, 5 to 7 minutes. Add the garlic and cook for another minute.

2.  Add the bay leaf, wine, stock and lentils and bring to boil. Adjust the heat so the mixture bubbles gently, cover partially and cook, stirring occasionally and adding water if necessary until lentils are tender, 25-30 minutes. Season with Salt and pepper and cook until lentils are desired tenderness. The lentils should be saucy but not soupy. Taste, adjust the seasoning and remove bay leaf/ Sprinkle with parsley and serve or store, covered in the refrigerator for up to 3 days.

3. Add 2 cups of roasted squash. Cut Squash into small cubes, toss in olive oil in coast and salt and pepper. Roast on a baking sheet at 375 degrees F until tender and caramelized. Add squash to the lentils in the last 10 minutes of cooking.


Tuesday, May 10, 2011

Orzo + Broccoli Pesto Salad


A few days ago during some rare, quiet moments to myself while my baby boy was taking an epic nap, I was surfing through some of my favourite food blogs and I stumbled upon this tasty little pasta dish on Sprouted Kitchen. I absolutely love LOVE pesto, I mean who doesn't? and I also love broccoli and so the idea of a broccoli pesto really got me curious. I'm also a fan of pasta dishes that can be eaten warm or cold since they always make easy lunches to pack up for the next day.

When I first met my hubby he hated broccoli with a passion. In fact he refused to eat it altogether and often he wouldn't even eat anything that the offending broccoli had touched! You think this is bad you should see his reaction to mushrooms, talk about dramatic. In all fairness, I am equally if not more annoying with my inability to eat any sort of pork product. Whenever we order pizza we order a large pizza "half vegetarian and half meat lovers", I kid you not!

Anyway, over the years I've slowly sneaked small amounts of broccoli in here and there and now he actually admits to liking it! Success! One thing that I consciously did to ease him into broccoli is I always chop the broccoli into tiny pieces so he never gets a huge mouthful all at once. Also cooking it, and I prefer steaming which retains the most nutrients, takes the bitter edge off as well. I suspect this method may also be helpful when trying to get children to eat their veggies.

Broccoli is a great source of vitamin C and dietary fiber as well as having known anti-cancer properties so go ahead and eat up!


Orzo + Broccoli Pesto Salad 
from Super Natural Every Day by Heidi Swanson

1 cup orzo pasta (I used 2 cups so I had plenty for next day lunch leftovers)
2 cloves of garlic
5 cups of raw broccoli cut up into florets
2/3 cups toasted pine nuts
1/3 cup freshly grated parmesan cheese
juice of one lemon
1/4 cup extra virgin olive oil
1/4 cup creme fraiche (I used plain yogurt instead which worked well)
grated zest of 1 lemon
1 avocado, sliced

Bring a large pot of water to boil and cook the orzo according to package instructions. When cooked, rinse in cold water. Next, steam or boil all of the broccoli for about 3-4 minutes, just enough to stay slightly crunchy, the last thing you want is soggy broccoli. Then make the pesto combining 2 cups of cooked broccoli (save the remaining 3 cups of broccoli for the salad), most of the pinenuts (save some for a garnish), parmesan and lemon juice in a food processer. Slowly add in the extra virgin oilive oil and creme fresh until it forms a nice, smooth pesto. Finally, toss the orzo, pesto and broccoli florets together and serve warm or cold. Sprinkle parmesan, sliced avocado, lemon zest, toasted pinenuts and fresh ground pepper on top to garnish. (Serves 6)


Friday, April 29, 2011

The Ultimate Caesar Salad: my mom's favorite


A few years ago while my mom was over for a visit, my hubby Kelly grilled a bunch of romaine lettuce heads on the BBQ and drizzled this salad dressing with grated parmesan cheese and freshly ground black pepper sprinkled on top. The result was spectacular and my mom talked about it for months thereafter. "Who would ever think to grill lettuce" she would say. Such a simple salad but so perfect it certainly does not need the crutch of croutons. Tonight we served ours with an organic BBQ'd steak from Empire Valley Beef on the side. Perfection.

Caesar Salad Dressing
from Rebar modern food cookbook

(yields 1 1/12 cups)
1 bulb of roasted garlic (drizzle olive oil over the top to roast)
juice of 1 lemon
1 tbsp capers
1 tbsp caper juice
1 1/2 tsp dijon mustard
2 garlic cloves (I only used one since I was going out later and didn't want super stinky breath)
pinch salt
black pepper to taste
1/3 cup grated parmesan
1 cup olive oil

Combine ingredients, except oil in a food processor or blender and blend. Add olive oil in a thin stream. I served our dressing on grilled romaine lettuce with extra parmesan cheese and cracked pepper sprinkled on top.


Monday, April 25, 2011

An Unconventional Easter Feast: Deconstructed Samosas


After a long day travelling home from a fabulous Mexican vacation with my family I suddenly realized it was Easter. Since my hubby and I were exhausted from sitting squished up for five hours on a plane holding a bouncing 7 month old baby and then a run for the BC ferries thereafter we decided to go for a simple yet unconventional Easter meal. These samosa sandwiches are so fantastically yummy you'll definitely be going back for seconds. The warmth of the spices goes down perfectly with a full bodied glass of red wine. We paired ours with Mission Hill Cabernet Merlot from the Okanagan Valley for a memorable Easter feast.

Spicy Peas and Mashed Potato Toasted Sandwiches
from VIJ's At Home (*serves 6)

1 lb potatoes
10 oz frozen peas
1/3 cup cooking oil
1 onion finely chopped
1 Tbsp finely chopped ginger
1 tsp salt
1 Tbsp garam masala or ground cumin
1 Tbsp cayenne pepper
1/2 cup finely chopped cilantro
10 bread rolls of choice
1 cup sour cream Indian dressing (see recipe below)

Boil the potatoes in a pot of water until cooked and then mash. While the potatoes are cooking rinse the peas in a colander in water to thaw and then add the peas to the mashed potato mixture. Saute onions until browned and then stir in ginger and saute for another 30 seconds. Add salt, garam masala and cayenne and sautee for 1 minute. Next add the pea and mashed potato mixture and mix in the chopped cilantro.

Toast the bread roll halves and the spread the sour cream dressing onto the bun and then spread the potato pea mixture on top. Serve as open faced or with another bun on top.

*I highly recommend making the whole batch even if you are not cooking for 6 people since this makes excellent next day leftovers for lunch.

Sour Cream Indian Dressing

1 cup sour cream (plain yogurt also works well)
1/2 tsp salt
1/2 tsp cayenne pepper
1 tsp green fenugreek leaves (I omitted this and it worked well)
1 clove garlic finely chopped


Wednesday, April 6, 2011

Spicy Cauliflower


After my fantastic birthday weekend of being spoiled by my two men and pure indulgence ie. cheesecake, brownies and too many glasses of red wine to even remember, I thought I'd better make something a little detoxifying. This recipe from Vij's at home is surprisingly quick and simple to make despite the long list of spices. I served mine with a side of quinoa and papadum which is a thin crisp, indian flatbread which can be eaten as a snack or alongside any meal. I discovered my love for papadum many years ago during a memorable trip to India with my adventurous sister Melody, I love its crunchy and nutty taste which always takes me back to that magical country.

Spicy Cauliflower
adapted slightly from Vij's at home

1 head cauliflower
1 tablespoon olive oil
1.5 cups pureed tomatoes
1 Tbsp finely chopped ginger
salt to taste
1 tsp tumeric
1 Tbsp cumin
1 Tbsp coriander
1 tsp cayenne pepper
*10 cloves (optional
pinch of cinnamon

* I accidentally misread this and added 5 cloves of garlic which actually tasted really great.

Cut up the cauliflower into large pieces, wash carefully in water. Combine oil and tomatoes in a pan and add spices. Saute well for 3-4 minutes and then add cauliflower. Reduce to low and cook until cauliflower is fully cooked but not too soft. Enjoy!