Wednesday, April 17, 2013
Zucchini Pasta with Prawns
With Spring finally here and Summer just around the corner I thought I'd post a new favourite recipe of mine that is light and refreshing. And as an added bonus it pretty much feels like a detox just eating it. Feel free to omit the prawns, I just wanted a little extra protein on mine. We love this recipe so much that it's definitely going to be making a regular appearance on our table and I swear you wont even miss the traditional wheat based pasta one bit. I definitely wont be missing the carbohydrate induced slump that regular pasta gives me.
Zucchini Pasta with prawns
from Whole Living
prawns (as many as you like)
2-3 medium sized zucchini
Sauce
7 oz box of cherry tomatoes, sliced
2 tablespoons (or more) ripped fresh basil
2 garlic cloves, sliced finely
1/4 cup crushed walnuts
2 tablespoon extra virgin olive oil
Use a peeler to grate the zucchini into shoestrings. This peeler works really well. Sprinkle with salt and let the noodles drain on a paper towel for 10 minutes or so. Try to soak up as much excess liquid as possible. Combine sauce ingredients. Serve immediately.
Tuesday, March 26, 2013
Spicy Mexican Black Bean Soup
This is my current favourite to soup to make. Simple and absolutely delicious as can be. Just throw everything in the slow cooker, walk away and get on with your day. I've tried many different online black bean soup recipes but they never turned out quite right. I was always craving the kind of black bean soup that one would find in a tiny little hole in the wall restaurant on some dusty street in Mexico. So after after many disappointing attempts and sad meals of bland and lumpy black bean soups I have finally come up with my own recipe which I feel hits the mark. Since I don't follow a recipe the amounts that I've listed below are somewhat approximate and so feel free to add a little more or a little less of each ingredient. You could also throw in different types of dried peppers if you have them. Enjoy.
Mexican black bean soup
2-3 cups dried black beans
1 onion, quartered
1 jalapeño, deseeded and roughly chopped
4-5 garlic cloves
1 Tbsp cumin
1 Tbsp pureed chipotle peppers
1 Tbsp chili powder
1 Tbsp mexican oregano (use regular oregano if you don't have mexican)
chicken stock (probably 5-6 cups at least)
pepper
1 lime
Garnish (optional)
tortilla chips
feta cheese
avocado
Other garnish ideas
roasted pumpkin seeds
plain greek yoghurt
sliced green onion
a spoonful of salsa
Rinse the dried black beans and throw into the slow cooker with the onion, jalapeño (deseeded), garlic, cumin, chipotle and chili powder. Don't worry too much about chopping things nicely since it will all be pureed in the end anyways. I usually throw my garlic in whole and quarter the onion. Fill the slow cooker so all the ingredients are well covered with chicken stock. You may need to add more water or chicken stock later since the black beans will absorb a tonne of liquid. After cooking for 6-7 hours check to ensure beans are cooked all the way through. Puree in a blender. At this point you may need to add a little more chicken stock or water so that it is a nice soup-like consistency. Also, taste it and perhaps and adjust the seasoning if needed. Before serving squeeze a slice of lime into each bowl, this part is ESSENTIAL even though it may not seem important. Sometimes I like to squeeze two slices of lime even! Sprinkle with feta and avocado if you have it and serve with tortilla chips.
Wednesday, February 13, 2013
Chimichurri Sauce: my favourite go-to-sauce
Chimichurri Sauce is originally from Argentina and is a popular dipping sauce for grilled meat. I've never been there but would love to one day! A gal can dream. I've found various recipes online using various proportions of parsley, cilantro and other herbs but this recipe I find the simplest and tastiest. All you really need is fresh parsley and lemon and the other ingredients are usually on hand.
Chimichurri Sauce
from Gourmet June 2008
1/4 cup fresh lemon juice
1/3 cup extra virgin olive oil
1 Tablespoon minced garlic
1 Tablespoon minced shallot
3/4 teaspoon hot chill flakes
3/4 cup flat leave parsley, chopped
Chop finely and blend OR do as I prefer and throw in the blender and puree.
This guy doesn't eat the sauce but such a cute photo I couldn't resist including it:)
Monday, January 14, 2013
Quick Healthy Lunch Idea: black bean tortilla roll-up
I don't know about you but I find it extremely difficult to find quick fast lunches on the go that are healthy and vegetarian. It's pretty much impossible. McDonald's is out, let's face it the salads there are crap. And most other fast food options are equally terrible. I am constantly annoying my husband when we are out and about around lunchtime and everyone is hungry and just wants to stop where ever and picky ol' me refuses to eat a burger and fries for lunch. Sorry guys, but I just know myself and I know if I eat poorly I'll feel sluggish and grumpy for the rest of the day.
So here is one lunch option I decided to make at home today and I think it could easily be packed up for a work lunch. I got the idea from the latest GOOP e-mail on Superfoods. Thanks Gwyneth!
Here is what I put in my wrap. I just know I'm going to feel great for the rest of the day after eating this for lunch.
Black Bean Tortilla Roll-up
adapted slightly from GOOP
1 whole wheat tortilla (I toasted mine on the pan but not necessary if taking it to go)
hot sauce
black beans
spinach
feta
avocado
1 smear of plain yoghurt
Friday, January 11, 2013
Aggression Cookies: a classic oldy
I never gave the name aggression cookies much thought but according to the many recipes posted online the name comes from the fact that one can get their aggressions and stress out while making these cookies, the longer you knead the better! Put some serious elbow grease into it. I remember it was fun as a child to get my hands all messy with the cookie dough and knead away.
Aggression Cookies
1 cup butter (unsalted and softened)
1 cup white flour
1 cup brown sugar
2 sugar old fashioned oats (don't use quick cook oats)
1/2 teaspoon vanilla
1 teaspoon baking soda
Put all the ingredients in a bowl and mash with your hands until mixed very well. Roll into 1 inch balls and place on an ungreased cookie sheet 2 inches apart. Press the cookies flat with the back of a glass. Bake at 350 degrees for 10 minutes or until lightly golden in colour. Remove from heat and let cool COMPLETELY before removing from cookie sheet or else the cookies will crumble. This recipe makes anywhere from 20 - 60 cookies depending on how large you make your cookies.
Thursday, December 27, 2012
Top 5 recipes from 2012: Mel and Lor's Picks
My sister Melody and I thought a fun way to sum up the year would be to each post our 5 favourite recipes of the year. While not necessarily from 2012, these are the recipes we made over and over - the ones we love and look forward to eating and making. I cannot wait to try some of her recommendations!
Lorelei's Picks
1. Salmon Hash - I just love this recipe. It requires very few ingredients which I usually have on hand - mostly just potatoes and canned salmon, which I'm very lucky to always have a plentiful supply of thanks to my fisherman dad Richard Wey. This dish is true west coast comfort food.
2. Mexican Rice from Rick Bayless Mexican Everyday. I found a link to it here. This recipe takes me back to when my hubby and I were carefree and more importantly child free on vacation in La Paz, Mexico and stuffing our faces with amazing mexican food and lime margaritas every day. What a dream.
3. Garlic shrimp and white beans from here. This is actually my favourite find of the year. So tasty.
4. Swiss chard tacos from Rick Bayless Mexican Everyday, I found a link to it here. Looking back I think this was my favourite cookbook find of the year. Fabulous and easy to cook mexican recipes that are quick enough for weeknights. Love it.
5. No Knead bread - I feel so smug whenever I whip up a loaf of artisan quality bread. Lovely with a nice bowl of steaming hot soup.
Melody's Picks
1. Glory Bowl from a fellow Canadian food blogger, Dollop of Cream. The dressing is so unbelievably tasty, you'll be tempted to bathe in it.
2. Creamy corn polenta with roasted tomatoes and asparagus. Again, amazing and this recipes is vegan. During the summer, I made this almost once a week using freshly shaved corn of a cob.
3. Made this recipe for Chinese New Year earlier this year and have been making it ever since. Great quick side dish.
4. Roast chicken with chickpeas, tomatoes and paprika. This recipe is one my sister blogged about a year ago, this dressing (the first five ingredients listed) is amazing and has become my go to dressing for roasting vegetables. My favorite combination is squash, tomatoes, chickpeas - roast for 20 minutes - then add feta cheese and chopped kale and bake for another 5-10 minutes. The perfect side to anything!
5. Chopped salad with feta, lime and mint. Great recipes using loads of crunchy raw veggies and (my favorite) feta!
Monday, December 3, 2012
My Favourite Tomato Sauce
Over the years I've tried countless grocery store varieties of tomato sauces in an attempt to throw together a quick weeknight meal but I'm always left feeling disappointed and quite unsatisfied. They always taste a little too heavy and a little too sweet for my liking. Then many years ago I was lucky enough to stumble upon this fabulous recipe from the concise gastronomy of Italy. It looks deceptively simple but I promise you that it tastes amazing.
The first time I made it I wondered why on earth I would be adding celery of all things, but you wont even be able to taste the celery in the finished sauce. It simply adds a light fresh taste to the sauce as if you are sitting out on a patio in Italy on a beautiful spring day enjoying a fresh bowl of pasta.
Throw this beautiful sauce on your favourite pasta, grate on some fresh parmesan cheese and enjoy.
PS. I usually double the recipe so I can freeze the leftover sauce.
Tomato Sauce
Makes 600 ML
800g canned plum tomatoes
2 tsp tomato paste
1 tsp sugar
2 onions, chopped
2 celery sticks, chopped
5 tbsp extra virgin olive oil
salt and pepper to taste
4 tbsp red wine
25 g/2 tbsp unsalted butter
Chop tomatoes coarsely and then put tomatoes into a saucepan with their liquid with the tomato paste, sugar, onions, celery, onions, olive oil and salt and pepper. Cook for 15 minutes or so and then puree in a food processor. Return to the saucepan and add the wine and continue cooking for another 40 minutes. Mix in the butter.
Friday, October 12, 2012
Breakfast for Dinner: Salmon Hash
A few years ago, my husband and I had a weekend away to beautiful Bowen Island. We stayed at a very cute B&B that served up an amazing homemade meal every morning right to your cottage doorstep. Sadly I cannot recall the name of this place but I seem to recall one of the owners was a former chef. So the night that we arrived the two friendly owners asked if we had any dietary restrictions for our breakfast the next morning. Unfortunately for them we are probably the most annoying people possible to cook breakfast for...I don't eat meat (except fish) and my hubby wont eat eggs. So we presented them with a real challenge..we fully expected granola and yoghurt in the morning or maybe waffles or pancakes but we were delighted when a beautiful spread of salmon hashbrowns arrived on our doorstep! I love salmon and I love hashbrowns who doesn't? and so this was an absolutely fabulous breakfast. Not to mention much better for keeping my blood sugar even (hypoglycemia) than pancakes and syrup would have been.
So here is my version of this breakfast although I like to make it for a hearty dinner. There is a lot of room for improvising but here is the basis of what I do. Let me know if you can think of any other additions to this recipe that would be good.
Ingredients
1 can of very good quality salmon (thanks sister Ashley for the can from Alaska!)
3-4 potatoes, chopped into cubes
handful of chopped dill
about 1 tablespoon capers
1 onion, thinly sliced
1 bulb fennel, very thinly sliced (use a mandolin if you have one)
tablespoon or more of olive oil
pepper to taste
Sauce
about 1/2 cup plain unsweetened yoghurt
1 tbsp chopped dill
1 teaspoon horseradish
ground pepper to taste
Turn oven to 400F. Toss cubed potatoes in olive oil and spread on parchment paper. Bake for about 30 min or until golden brown.
While potatoes are cooking start frying the onion, the longer it cooks the more caramelized it will be become. After about 10 minutes of the onions frying add the fennel. Once the fennel is cooked and the potatoes golden brown add the canned salmon, dill and capers. Salmon hash is done!
To make the sauce just mix all sauce ingredients together.
Serve a big bowl of salmon hash with a dollop of sauce on top.
This was a very good quality can of salmon that my sister Ashley brought me from her trip to Alaska
Here are some old pics I found of our trip to Bowen Island about 2 years ago!
Me, pregnant with baby #1
Thursday, September 6, 2012
Kale Caesar Salad
My sister Ashley is many things and one of those many things is an incredible gifted piano player... jazz piano to be exact, and her fantastic album can be found here. She is also somewhat of a free spirit, a constant world traveler, a "health nut", a yogi, a night owl and anyone who has crossed her path would agree she is an incredibly positive and kind hearted person.
At this very moment she is playing piano on a cruise ship which sails from Vancouver to Alaska every week. Most of the time she floats around Europe and so to have her on the west coast or "fresh coast" as she calls it is a real treat. Yesterday, she had a few hours off the boat and she jumped onto the sky train, with 2 broken toes after dropping a keyboard on her foot, and headed out to Burnaby to see me and her new nephew for a few blessed hours. Knowing that my sister has VERY strict food requirements...she's mostly a raw veganist but lately will eat some wild meat, I decided to make us an extremely healthy salad. I figured I couldn't go wrong with kale.
I've actually been making this salad fairly regularly now for a few months now and even the biggest kale haters will love it. My own mother could not believe she was actually eating raw kale when I told her as she was devouring a bowl of it. I like to make it when I feel the need to detox or just feel like eating something that will make me feel good.
Kale Caesar Salad
adapted slightly from here
1/4 cup fresh lemon juice
1 garlic clove
1/2 cup lemon juice
8 whole anchovies
1 teaspoon dijon mustard
1 large bowl of shredded kale (about 8 cups)
1/4 cup parmesan cheese for the dressing
1/4 cup parmesan cheese for garnish
salt and pepper to taste
Optional: add any other chopped vegetables or protein to the finished salad. I added a few cherry tomatoes and cucumbers here. Sometimes I like to add good quality canned smoked salmon or smoked tofu.
Toss all ingredients into the blender, saving 1/4 cup parmesan for a garnish. Place kale in a large bowl and toss with dressing. Garnish with parmesan and serve.
Thursday, August 23, 2012
Mushroom Salad
As almost vegetarians, Melody and I have both been eying this beautiful cookbook for quite a while with its beautiful food photography and totally mouth watering looking vegetarian dishes. So before we both buy yet another cookbook, it we decided to give it a test run by borrowing it from the library first and trying out a few recipes. Here is one recipe we made and it was a success. Chef Yotam uses herbs and ingredients in ways I would never think would taste good together i.e. mushrooms and dill? but it works just right.
I'm going to test drive a few more recipes from this book but I will probably end of purchasing it. There's only so many times the library will allow me to renew books after all:)
Marinated Mushrooms with Walnut and Tahini Yoghurt
adapted slightly from PLENTY by Yotam Ottolenghi
Serves 4
1/3 cup olive oil
1 tbsp balsamic vinegar (the original recipe calls for white wine vinegar. I've since made it with apple cider vinegar and that works really well)
1 tbsp maple syrup
juice of 1 lemon
salt and pepper
3 cups sliced beech muchroons
2 cups other mushrooms
3 cups chick peas (recipe calls for lava beans)
2/3 cups walnuts
1/2 tsp ground cumin
1 tbsp chopped dill
1 tbsp chopped oregano
Sauce
1/2 cup plain yoghurt (recipe recommends greek yoghurt)
21/2 tbsp tahini
1 garlic clove
juice of 1 lemon
Friday, July 6, 2012
My New Favourite Salad
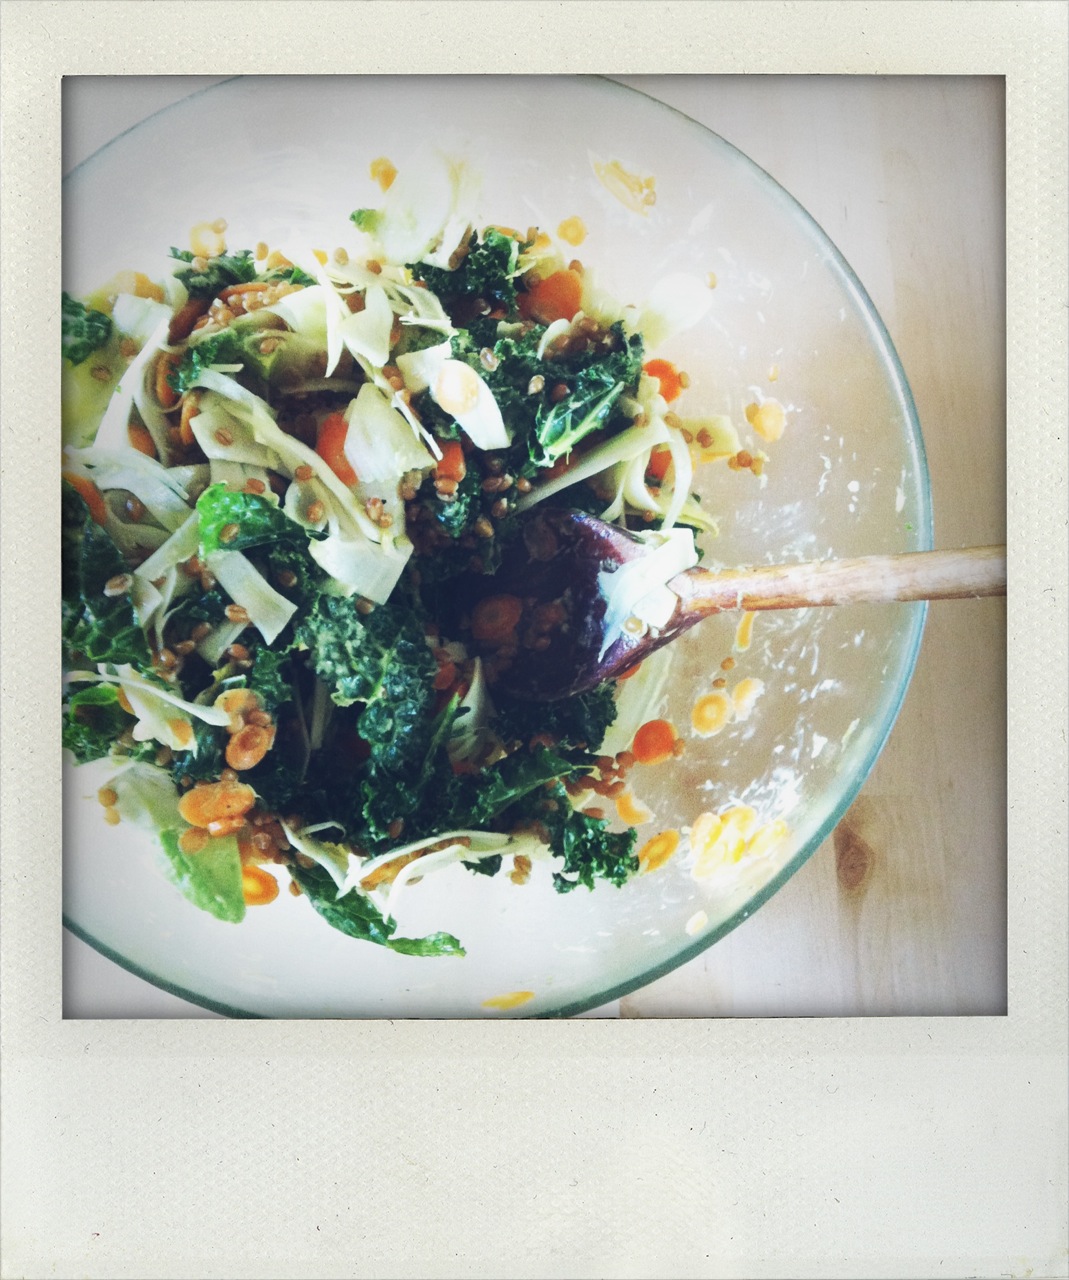
I haven't had much time lately for adventurous cooking in between changing two set of diapers and running after a 21 month old, breastfeeding a newborn, changing more diapers and then oh, trying to sleep once in a while, and I use the term "sleep" very loosely here. However I have somehow managed to make this Kale Market Salad fairly regularly from the fabulous 101 Cookbooks blog. This salad is so tasty and so healthy that I must admit I feel pretty smug whenever I eat it.
The only time consuming part of this recipe is soaking and then cooking the wheat berries which does in fact require some planning ahead. Speaking of wheat berries...I never realized what a cheap grain it is! I marched into Whole Foods a few weeks ago determined to find this elusive grain and was shocked when I got to the register with a massive bag and it came to only 4 bucks! I thought there surely must have been a mistake and so I smiled and politely thanked the cashier and then promptly ran out of the store clutching my massive bag of wheat berries feeling like I had just robbed a bank. Later, upon closer inspection of my receipt I was actually charged correctly. It turns out that wheat berries are just a very cheap grain. Who'd have thought? It certainly sounds fancy...the same sized bag of quinoa would have cost $20 at least.
I follow 101 Cookbooks recipe pretty much to a tee, so out of shear laziness and fatigue I don't think I'll bother typing out the recipe myself, just click the link to find the recipe. Enjoy!
Wednesday, June 20, 2012
Baby Boy
Sorry for the delay in posts! Things have been a little crazy around here. Here is a pic of what I've been up to:) xox Lorelei
Wednesday, May 23, 2012
No-Knead Whole Wheat Bread
Yesterday, in order to kill time before this baby arrives, I waddled over to my local library and spent some quality time perusing the cookbook aisle. There's nothing that gets me inspired to cook and bake like pouring through beautiful cookbooks. I admit that I own an embarrassing amount of cookbooks but for some reason its just never enough. So after about 30 minutes where I actually ended up sitting on the floor of the library aisle, I mean who is really going to tell the big pregnant lady to get up after all? I was lucky enough to stumble upon Jim Lahey's book entitled My Bread - The Revolutionary No-Work, No-Knead Method. I've read some buzz about this book before online and so I knew as soon as I saw the book that I had to try it. The promise of No-Knead and No-Work appealed to me right away. How can baking bread possibly be no work? I was intrigued.
The key to Lahey's method is to use very little yeast and a very long rise time...18 hours in fact. So you really need to plan ahead if you want to make this bread. Lahey claims the long fermentation period is what gives his bread the flavour and structure of artisanal quality bread. The other twist is that he bakes his bread in a covered cast-iron or ceramic pot which accomplishes what a brick oven does by creating steam in the pot to result in a fantastic crust and a moist bread crumb.
All in all I was blown away by the results! I would never have guessed that I myself could bake such a loaf that tastes just like I picked it up from some sort of artisanal bakery. I will definitely be giving a few more of Lahey's recipes a try, probably pizza dough or focaccia will be next on my list.
Unfortunately I do not actually own a covered cast-iron or ceramic pan and so I ended up using a glass pyrex casserole dish with a glass lid which seemed to work well. Although perhaps this is a good excuse for me to go buy one?
Jim Lahey's No-Knead Whole Wheat Bread
from My Bread
21/2 cups bread flour (I just used regular white flour here)
3/4 cups whole wheat flour
11/4 teaspoons table salt
1/2 teaspoons yeast
11/3 cups cool water
wheat bran, cornmeal or additional flour for dusting (I used a handful of ground flax seed)
Directions
Mix all of the dry ingredients in a medium bowl. Add water and incorporate by hand or with a wooden spoon or spatula for 30 seconds to 1 minute. Lightly coat the inside of a second medium bowl with olive oil and place the dough in the bowl. Cover the bowl with plastic wrap and let the dough rest 12 hours at room temperature (approx. 65-72°F).
Remove the dough from the bowl and fold once or twice. Let the dough rest 15 minutes in the bowl or on the work surface. Next, shape the dough into ball. Generously coat a cotton towel with flour, wheat bran, or cornmeal; place the dough seam side down on the towel and dust with flour. Cover the dough with a cotton towel and let rise 1-2 hours at room temperature, until more than doubled in size.
Preheat oven to 450-500°F. Place the pot in the oven at least 30 minutes prior to baking to preheat. Once the dough has more than doubled in volume, remove the pot from the oven and place the dough in the pot seam side up. Cover with the lid and bake 30 minutes Then remove the lid and bake 15-30 minutes uncovered, until the loaf is nicely browned.
Thursday, May 17, 2012
Southwestern Black Bean Salad
Yesterday marked my first official day of maternity leave! Wow, feels like just yesterday I was on maternity leave with my first baby and well, it probably feels like that because it practically was! 8 months ago that is. What bliss it was to sleep in past 5:30am and actually get to sit down for breakfast with my family and not rush out the door with my toast wrapped in a napkin.
So now begins the waiting game for baby number 2. The official due date isn't for another 2 weeks but I really REALLY hope this baby will be a few days early at least. I feel like I deserve a break after being 14 long days overdue with my first baby. The longest 2 weeks of my life that was!
So I spent yesterday doing some lazy cleaning and organizing, some might call it "nesting" but I don't feel like I'm really doing much other than throwing out mouldy food from the fridge and putting things aways that I should have put away weeks ago. I also laid out in the sun and started reading the much hyped about "Fifty Shades of Grey". I'm only on page 80 so I haven't formed a real opinion yet but I agree with my friend Ashley Faris that it's a "bit repetitive and tiresome at times". But then so was the Twilight series in my opinion and apparently Fifty Shades started loosely based on that, so go figure. Have any of you read it? Thoughts?
Anyway, I also whipped up this little salad that I stumbled upon while checking out a fantastic blog called Skinnytaste which my friend Meghan mention on her cool blog here. So I guess it goes without saying that I also spent a good chunk of yesterday aimlessly blog surfing as well. Which isn't a terrible thing.
I was really happy with the results of this salad although I think next time I could beef it up even more with a chopped red pepper. I also added crumbled feta cheese as a garnish which really worked well as well as some cucumber and jalapeño which I had on hand. We served ours on the side with a grilled steak.
Southwestern Black Bean Salad
adapted from Skinnytaste
1 15.5 oz can of black bean salad, rinsed and drained
9 oz frozen corn, thawed
half a small container of cherry tomatoes, cut in half
1 shallot, finely chopped
juice of 1 lime
2 Tbsp olive oil
salt and pepper to taste
half a cucumber (peeled and chopped in quarters)
half a minced and deseeded jalapeño
1 Tbsp chopped cilantro (or more to taste)
Garnish with
feta cheese
chopped avocado
Mix all ingredients together and marinate in the fridge for 30 minutes and then top with feta and avocado.
Tuesday, May 8, 2012
Keftedes
Hello! I don't usually make posts involving meat since I don't usually like to cook or eat a lot of meat, however this fantastic recipe has been sneaking its way into our regular rotation lately so I thought I'd better share it.
Throughout this pregnancy (and my last pregnancy) I've had to make a concentrated effort to up my red meat consumption in addition to choking back extra iron supplements and stuffing my face full of as many leafy greens to rival popeye since I find myself once again battling the exhausting effects that Thalassemia Minor anemia can have on pregnancy. Most people have never heard of this and so very briefly, it's a genetic autosomal recessive blood disorder originating from the Mediterranean, which is funny since I couldn't look farther from Mediterranean with my pasty white skin and light blond hair. But alas, I guess some genes must have slipped in at some point perhaps centuries ago.
So since it's been proven that I have mediterranean blood it makes perfect sense to me that I LOVE italian and greek food. This greek recipe comes from a beautiful cookbook named Three Sisters Around The Greek Table which I received a few weeks ago as a birthday gift from my lovely husband. I myself am a middle sister out of three sisters and so the title appealed to me right off the bat. Beyond the catchy title this cookbook is filled with beautiful photography and tasty recipes that I cannot wait to try.
Parsley and Mint Meatballs (Keftedes)
from Three Sisters Around The Greek Table
prep time 10 min
cooking time 20 min
1 lb extra lean ground beef
1/2 yellow onion, minced
1/2 cup each fresh parsley and mint, chopped
1/2 cup bread crumbs
1 egg
1 tbsp yellow onion
1 tbsp fresh lemon juice
1 tbsp dried oregano
salt and pepper as desired
Combine all ingredients in a large bowl and mix thoroughly with your hands. Let sit for at least 1 hour.
Shape into bite-sized balls and place on a lightly greased or parchment paper lined pan.
Bake at 450 degrees F for 15-20 min or until cooked all the way through. Serve with tzatziki or just on their own.
The results of someone getting into a bag of flax, probably not the best thing for the dog.
Friday, April 20, 2012
Pierogies and Phil Collins
Hello All! I got the bug in my head a few months ago to make pierogies when I had dinner at the Habit Lounge here in Vancouver with my good friend Lena. We shared an amazing plate of carrot and brie pierogies, or is it pierogi? as well as a tasty salad and a slice of heavenly cheesecake. But it's those pierogies that I haven't stopped thinking about!
Usually for me, the idea of pierogies conjours up terrible thoughts of tasteless, greasy, mushy potato pierogies cooked from a frozen bag during my cooking-challenged university years. But these little carrot and brie nuggets were a world part. Sweet and creamy and packed packed full of flavour, it was the ultimate comfort food for this pregnant gal.
I found this recipe in one of my favourite go-to cookbooks of all time, the Rebar Modern Food Cookbook from one of my childhood favourite restaurants in Victoria, BC. The smoked gouda gives a wonderful bacon-like flavour which pairs perfectly with sweet yams and leeks. Yum! Serve with a big spoonful of caramelized onions and sour cream (or plain greek yoghurt as we did) and you've got yourself a fantastic comfort food meal.
I have to admit that this is definitely a two man job and it does in fact take several hours to complete so only attempt this if you've got several hours and some serious patience on your hands. This recipe made TONS and so we ended up freezing several bags for future dinners, which isn't a bad thing. Oh, and with all the time we spend rolling dough and painstakingly filling and folding dough, Phil Collins for music proved to be the perfect soundtrack for this long evening.
Roasted Yam and Gouda Perogies (3 dozen pierogi)
from the Rebar Cookbook
Filling
2.5 pounds yams
1 Tbsp butter
1-2 large leeks, mostly whites, chopped
1/2 tsp salt
1/2 pound smoked gouda cheese grated
1/4 cup minced chives
1/4 tsp cracked pepper
1/4 tsp caraway seed (optional)
Pierogi Dough
4 cups unbleached flour
3/4 tsp salt
4 egg yolks
1 cup boiling water
2 tbsp vegetable oil
Directions
Filling can be prepared up to 1 day in advance. Preheat oven to 400 degrees F and roast yams in oven until soft and puffy.
While the yams roast, heat butter in a skillet and add leeks and salt and sautee until golden brown. Combine leeks, mashed yams, grated cheese and chives. Season with cracked pepper, caraway seeds and salt. Refrigerate until ready to use.
Next, make the dough. Mix the flour and salt in a bowl. Add remaining ingredients and beat with a spoon until a smooth dough forms. Cover and let rest for 30 minutes. Divide the dough into quarters and roll out into 1/8" thick or less. Use an approximately 3" round glass or jar lid or cookie cutter if you have it and cut circles out of the dough.
Place a good teaspoon or more in the centre of each dough circle and then press the edges to seal. I dipped my finger in water and ran it along the edge before sealing to help it stick better. I then used the ends of a fork to make a crimped edge.
To serve, boil in water until they begin to rise to the surface (about 5 minutes). Stir occasionally to prevent sticking. Remove with slotted spoon and toss in butter and chives. Serve with fried onions and sour cream.
FYI, I halved the filling amounts above since the full amount made a totally outrageous amount of filling that in now way would ever fit into the amount of dough made.
Wednesday, April 4, 2012
Hello Pinkberry!
So I just tried Pinkberry frozen yoghurt for the first time! and I have to say it was pretty darn good! It also happens to be my birthday and what better way to splurge than on a tasty frozen yoghurt. I've heard nothing but amazing things about this stuff over the years, some even call it the "crack" of frozen yoghurt. And so when I noticed one had opened in Metrotown close to where I live in Burnaby, B.C. I really had no choice but to try it. I went for the original flavour with fresh mango and strawberries which is practically health food I kept telling myself. This could become addictive....
Friday, March 9, 2012
The Unrefried Beans
Well, what can I say.....it's pretty hard to make refried beans look appetizing....
Last weekend while at one of my very favourite quick lunch spots, Que Pasa Mexican Food Store, I picked up a bag of dried pinto beans with the good intention of making my very own homemade refried beans. I've never actually done this before but for years I've been meaning to. I've always loved a good refried bean burrito with melted cheese on top and it's always bothered me that the cans of refried beans in the store are almost always loaded with salt and fat. So since I took today off work as a much needed vacation day I thought I'd dust off the ol' slow cooker and put it to work.
I searched through many online recipes before I stumbled upon the Chef Claude's recipe below. Most recipes called for bacon fat or pork lard, GASP! I searched and I searched until I found one that was healthy sounding and animal fat-free. This recipe was easy as can be and tasted better than any store bought refried bean can I've ever found. Serve in a burrito with tortilla chips or as a bean taco as I did.
Refried Beans
adapted from Refried Beans without the Refry by Chef Claude
2 cups dried pinto beans, rinsed
2 garlic cloves, chopped
1 teaspoon cumin
1 teaspoon chiptle puree
1/2 jalapeño, deseeded and chopped
1 onion, chopped
5-6 cups water (or enough to cover beans well)
salt and pepper to taste
Place all ingredients into a slow cooker for 5-7 hours. Once beans have cooked drain and reserve the water. Puree slow cooker contents adding reserved water (I did not need to add any water) as needed to reach the desired consistency. Add salt and pepper to taste.
Saturday, March 3, 2012
Chicken Pot Pie....something warm to tuck into
When I think of Meat Pies, I immediately think back to the comforting beef and chicken pot pies that my family would eat made fresh from Lunn's Pasty Deli and Coffee Shop located in the town where I grew up in Sidney, B.C. This place has warm flaky pies and every kind of pastry imaginable, they are the real deal. Even now at Christmas my parents still bring home a box of Lunn's mince meat pies and other assorted pastries...wouldn't be Christmas without them! So it goes without saying that my standard for meat pies is pretty darn high. A soggy, flavourless, mushy meat pie simply will not do.
So when I saw Jamie Oliver making his Chicken Pie on his Meal In Minute's television show I knew I had to give it a go. Even more tempting since he promises it can be done in under 30 minutes. I was a little intimidated with using puff pasty as I've never really used it before and it just sounds fussy and finicky which puts me off a little since I generally lack patience with such things. So I was pleasantly surprised at how easy packaged puff pasty is to handle. Foolproof really.
I set the timer and went to work and managed to get the pie into the oven in 11 minutes flat! Wow! even with my little guy running around at my feet. And it definitely satisfied the comfort food craving I had. Another winner in my book.
Chicken Pie
adapted slightly from Jamie Oliver's Meal's In Minutes
2 chicken breasts
a pat of butter
a bunch of green onions
2 carrots, quartered and diced
2 teaspoons dijon mustard
11/2 tablespoon plain greek yoghurt (the original recipe calls for creme fraiche which I couldn't find)
1 egg
1 large sheet of puff pastry from a 14-ounce package
pinch of nutmeg
3-4 sprigs of fresh thyme
11/4 cups good chicken broth
a few handfuls of frozen peas
1 tablespoon flour
* The original recipe also called for mushrooms which I unfortunately was forced to omit due to one member of this household being "allergic" to them. It would definitely be a great addition.
Slice chicken into 1/2 inch strips. Put a lug of olive oil and a pat of butter into a large pan. Add chicken and cook for 3 minutes or so. Meanwhile put slice the green onions and add to the pan along with the peas and 1 tablespoon of flour, stir. Add the mustard, yoghurt, chicken broth and stir. Add thyme and nutmeg, continue to stir. Add salt and pepper.
Lightly dust a clean surface with flour and unroll the sheet of puff pasty. Use a small knife to lightly crisscross and score it. Take the pan of chicken off the heat. Tip the filling into an ovenproof baking dish slightly smaller than the sheet of pasty. Cover the filling with the pasty sheet, tucking it in at the edges (like in the picture). Quickly beat the egg, then brush it over the top of the pie. Put into the oven for about 15 minutes, or until golden and gorgeous.
So good I went back for seconds...
Pretty as Pie
Even this guy liked it! Victory!
Subscribe to:
Posts (Atom)